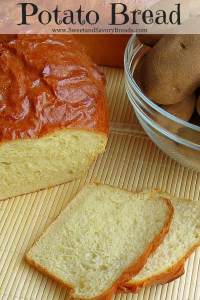
 Today I want to tackle…dun, dun, dun, duuuun. The fear of baking bread.
Potato Bread, the light yet chewy, flavorful sandwich bread. Great for sandwiches whether they are peanut butter and jelly for the two year old, or trip-tip and salsa for dinner. This is the bread that challenged me.
I feel that there is a great mystery and magic surrounding bread making. Maybe its because I have read about it being historically regulated by certain governments, maybe its because there is what seems to be an elitist coterie of artisan bread chefs, maybe its because bread making has its own vocabulary of foreign terms such as levain, biga, and autolyse. (Which thankfully is explained in detail here.) Maybe, like many things, from the outside it looks more difficult than it really is.
“What if I make this recipe, and after 5 hours invested, it turns out like crap?”
I asked myself this over and over. Analyzing my fear, I realized that it is due to the following two risks. For one, I splurged on premium brands of bread flour and yeast, so there was a small, albeit legitimate, financial investment. Secondly, and the more prominent concern to me, is that making bread the “old fashioned way” involves quite a bit of time. Time that is at a premium with a potty training toddler demanding the majority of it.
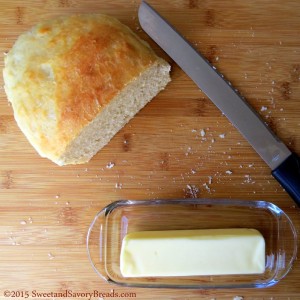
So, as is usual when I embark on a new project, I educated myself. I looked at books, I read the “official” websites, and reviewed the forums. I learned everything I could about leavening with yeast. Yet having done so, I felt even more intimidated. I read about artisan bread makers, having made bread everyday for umpteen years, and they were still modifying their method.
So I turned to the ingredients themselves. I investigated the difference between Active Dry Yeast and Instant Yeast; their composition and the common uses and problems associated with the two. In the meantime I went off on a tangent which deserves a post of its own in which I investigated baking soda and baking powder…Before I forget to share, I put together a printable leavening agent cheatsheet here.
With a lot of my recipes based on the “quick wins” of using store bought shortcuts and making quickbreads, making homemade bread is a departure from the usual for me. In doing so, it required a shift in mindset.
I had to have faith in the recipe, my oven, and my own two hands. I also had to believe in those tiny yeasty organisms to munch and munch AND munch!
If that wasn’t enough, one more factor came into the equation, and that is the weather. The first day of spring has passed, but for us Arizonans this is the beginning of our long summer. It is in the 90’s outside, and getting into the 80’s inside the house. I hate to say it, but it is getting more and more difficult to want to start a hot fire in my house when I have a sweaty brow to start with. So despite my research, I must admit I was looking for shortcuts on the first recipe.
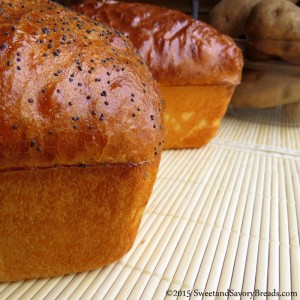
For the first potato bread recipe, I opted for instant mashed potatoes, and I wanted to avoid the oven so this recipe was for the bread machine. What sounded great to start with, ended with the bread machine smoking like a chimney, and the dough being placed in the oven anyway. It ended up not rising much, but the flavor and chewy texture was good. The loaf was eaten within the day so it wasn’t too awful. But it wasn’t what I was looking for.
For the second go around, I consulted my trusty Joy of Cooking cookbook. This recipe involves a whole (new) potato, cooked and riced/mashed and it also uses active dry yeast, 15 minutes of kneading by hand, and two rises.
Ultimately, it seemed a lot more complicated than it was. My grandma says her mom would make bread every day for their family. I would think how hard times were back then, and lump bread making into the laborious duties of pumping water from a well and scrubbing dirty cloth diapers on a washboard. However, looking at the recipe, it only involved 30 minutes max of my attention. Only 15 minutes of that required my undivided attention while kneading. The rest of the time I just let the yeast do the work. I was able to go about my business, knowing that the timer I set would remind me to check on it.
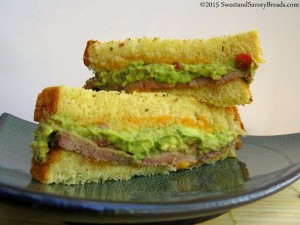
And those 15 minutes of kneading, they were magic! I worked that dough with my hands. It got sticky, and I had to use a dough scraper for the last 5 minutes to pull it together, but I watched and felt the dough change in my hands. It wasn’t only money and time that were spent on these two loaves. I put my energy and love into them. I will never claim to be an expert, but my 2 year old thinks I am. When I go in the kitchen, I have been giving my loaves a sideways glance and yes, I do feel a bit of pride. Plus my husband used my bread to make a tri-tip sandwich, and *gasp* took a photo and posted it to Instagram, with #hashtags! lol And that’s good enough for me.
“Me eat more bread please Mama, Yay!”
– daughter, age 2
|
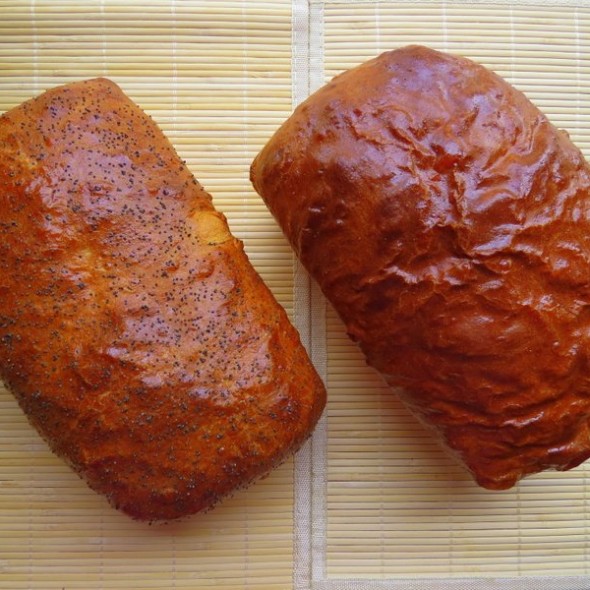
This recipe makes 2 loaves of potato bread that is fit for a sandwich, french toast, or slathered in butter. It is very similar to store bought bread in shape and density and slice-ability.
|
- 2 Tablespoons white vinegar
- 2 cups milk
- 3/4 cup potato cooked, and mashed
- 2 packages active dry yeast
- 2 Tablespoon sugar
- 2 teaspoon salt
- 2 eggs lightly whisked
- 6 1/2 cups bread flour
- 1 egg whisked
- 2 Tablespoon poppyseeds (optional)
- Place the milk in the microwave for one minute and then mix in the vinegar. Let stand 5 minutes. (Or use buttermilk instead).
- Place the riced/mashed potato while warm into the bowl of your mixer. Add the stick of butter and blend on low speed. Add the milk mixture, yeast, sugar, salt and eggs and continue blending on low.
- Place into greased bowl, covered with greased plastic wrap. Let rise for 1 1/2 hours.
- Punch down dough and place on surface. Cut into two loaves and form into a loaf. Place seam side down into two 9" x 5" x 3" pans.
- Brush with a lightly whisked egg, and sprinkle with poppy seeds if desired.
- Gradually add 5 1/2 cups of the flour or until the dough pulls away from the bowl.
- Place 1/2 cup of flour on a clean surface, and flour your hands. Place dough on the flour and begin kneading the dough. Stretch the dough with the palm of your hand, fold it back onto itself, and give a quarter turn. Do this for 5 -10 minutes. If dough gets sticky, use a dough scraper to bring the dough back onto itself. Add the remaining 1/4-1/2 cup flour and knead for an additional 5 minutes.
- Place the dough in an oiled bowl, and cover with oiled plastic wrap. Place in a warm, draft-free location and let rise until doubled in size. Approximately 1-1/2 hours.
- Punch down the dough in the bowl, and remove to an oiled surface. Cut the dough into two loaves. Shape the dough into loaves by folding into thirds like an envelope, fold the sides inward, and seal with your palm. Place seam side down into two oiled 9" x 5" x 3" bread pans. Cover with oiled plastic wrap. Let rise for 1 hour. (You will need to have the oven preheated to 375° and egg wash at room temperature before the hour is up, so plan accordingly).
- Brush egg wash onto surface of bread and sprinkle with poppyseeds if desired. Place in preheated up. Bake for 30 minutes, or until surface is golden brown and bottom of bread sounds hollow when tapped.
- Let cool on a baking rack for 30 minutes before slicing.
- This recipe makes 2 loaves of potato bread that is fit for a sandwich, french toast, or slathered in butter. It is very similar to store bought bread in shape and density and slice-ability.
Store in tightly sealed plastic wrap at room temperature for 2-3 days. Or, place one in the freezer for later!
|
|


